A few notes before beginning your windshield installation:
- These instructions depict the installation of a Solve Product Design windshield on a Honda CRF250L. All steps are the same for the CRF300L.
- When installing the windshield, do not force it into position. The two tabs that fit into the pockets on the headlight bezel can snap off if too much force is applied. If you are having trouble it is best to have a second person help you by flattening out the headlight bezel while you drop the windshield into place. Slide one tab into place, flatten out the headlight bezel, and the second tab should drop in easily.
- The headlight bezel is very flexible and much less likely to crack or break than the windshield. Ensure that the bezel is at room temperature before trying to flex it too much.
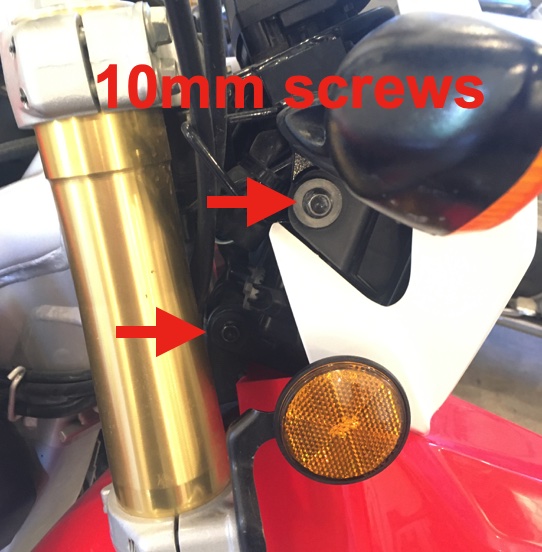
Remove 4 bolts (2 per side) holding the headlight assembly in place using a 10 mm socket wrench.
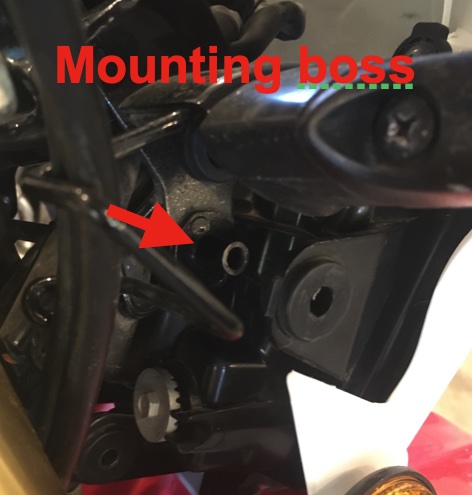
Note that the upper-right connection (when viewed sitting on the motorcycle) is mounted over a boss on the frame.
The headlight assembly must be rotated forward and to the right before the upper-right mounting point can be slid off this boss. The other 3 mounting points consist of rubber bushings and metal inserts. Be careful not to lose these inserts as they can fall out during disassembly or assembly.

Once the headlight is free from the mounting position, carefully remove the connector from the headlight by squeezing the tabs on each side and pulling it straight out.
Remove 4 Phillips screws holding the headlight to the headlight fairing.
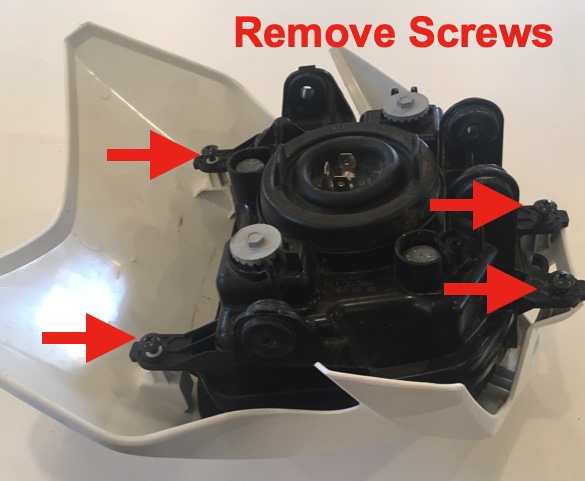
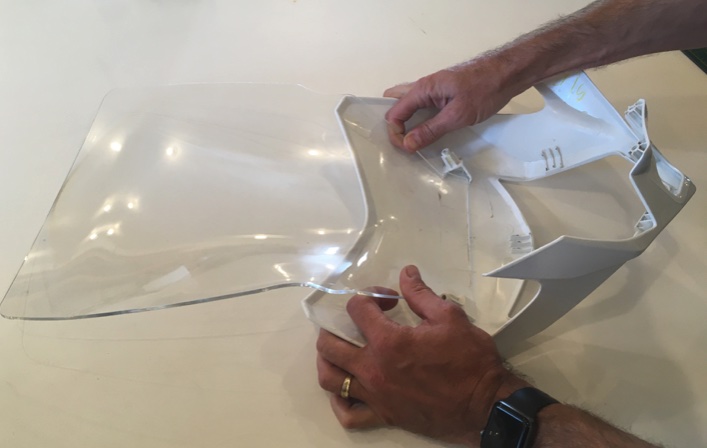
The headlight fairing has two pockets under the upper mounting bosses. Two tabs on the windshield will fit into these pockets. To install the windshield, press down on each side of the fairing against a flat surface. This will flatten the fairing and spread the mounting bosses apart allowing the tabs of the windshield to drop into place. Do not force the windshield into place or you will risk snapping off the tabs. The headlight fairing is very flexible and difficult to break. Find an assistant if necessary.
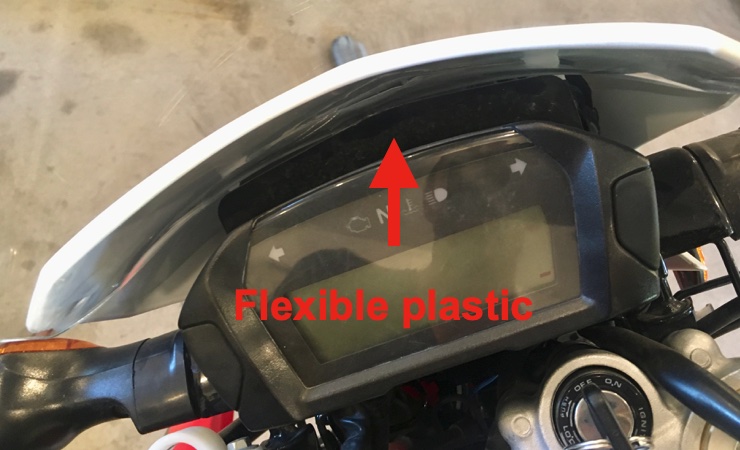
Assembly is done in the reverse order. Note that there is a flexible plastic panel above some connectors. This panel will press against the windshield and hold it forward against the headlight fairing. It might flex upwards during installation but can handle the load without issue.
*** NOTE: If you have difficulty lining up the lower headlight bolts, remove the front fender to ease access. The fender is held on with 4 bolts accessed below the fender.